
Using the REST API Key
The REST API Key created for a tenant is used for authorizing REST API endpoints. These keys are static and do not change or expire, unlike Session IDs.
Creating a REST API Key Group
When using this feature for the first time, you need to create a group for REST API. If it already exists, then you can skip this step and proceed to create a REST API Key.
- From the Configuration console , click Configure > Security Controls > API Keys.
- Click Add Key Group. The application displays the New API Group page.
- Enter a contextual name and description for the group in the Name and Description fields.
- Click Save Key Group. A REST API group is created.
- Click Back to return to the API Keys page.
Creating a REST API Key
- From the Configuration console , click Configure > Security Controls > API Keys.
- Select the relevant group created for REST API from the Key Groups section.
REST API Group
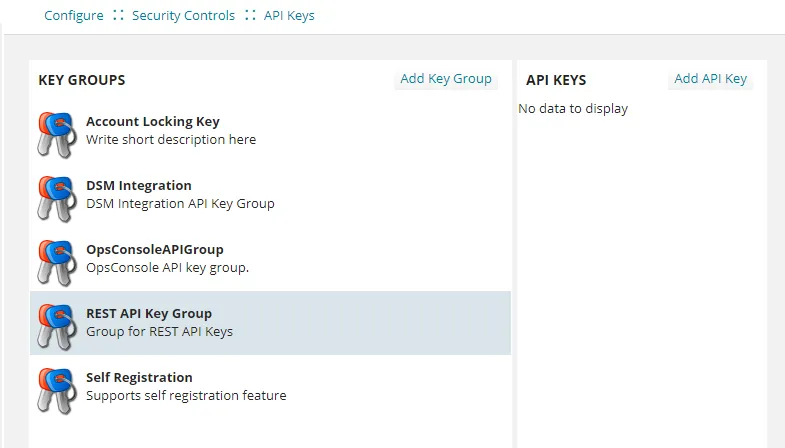
- Click Add API Key. The application displays the New API Key page.
- Enter information into the fields:
- Reference ID - This field is auto-generated. This ID is the REST API Key you need to use for endpoint authorization.
- Activated - Select or clear the check box to activate and deactivate the key.
- Description - Enter a description for the key.
- On Behalf Of - Select the name of the user creating the key.
- In Role - Select the role of the user creating the key.
- By default, the REST API Key created is applicable for the logged-in tenant. However, you can add additional IPs to this key. To do so, click Add New IP, enter the IP address and click Ok.
- Click Save Key. The generated REST API Key is saved with the details you entered.
- Click Back to return to the API Keys page.
Editing a REST API Key
- From the Configuration console , click Configure > Security Controls > API Keys.
- Select the relevant group for REST API from the Key Groups section. The application displays the list of available keys.
- Find the key and click Edit.
- Modify the details as required and click Save Key.
Deleting a REST API Key
- From the Configuration console , click Configure > Security Controls > API Keys.
- Select the relevant group for REST API from the Key Groups section. The application displays the list of available keys.
- Find the key and click Delete.
Using the REST API Key
To use the REST API Key as authorization when executing an endpoint:
- Create a new request in the Postman application.
- Enter the following information in the Header tab:
- Select the Authorization check box.
- Enter the Reference ID (REST API Key) generated for the tenant in the Value column in the format - rest_api_key={Reference ID}.
- In the same endpoint request window, enter the endpoint request payload details and click the Send button or press the ENTER key.
When executing REST APIs from a tenant, the REST API Key generated for the same tenant can only be used and not of any other tenant. For example, REST API Key generated for Tenant#X cannot be used for executing APIs from Tenant#Y.
Supported API-Key Formats
There are 4 supported API-key formats:
- Authorization: RestApiKey
- Authorization: rest_api_key=
- Authorization: api-key
- X-API-Key:
X-API-Key is used only when no Authorization header is present.
Troubleshooting REST API Key
When you execute a REST API endpoint, you get a not authorized error.
Reason:
The REST API Key used to authorize the endpoint does not belong to this tenant/IP.
Solution:
Create a new REST API Key for this tenant/IP. See Creating a REST API Key.