
Using the Classic Action Designer (CAD)
Use the Classic Action Designer (CAD) to create and edit actions associated with the workspace or object context.
Accessing the Classic Action Designer from the Neurons for ITSM Application
To access the Classic Action Designer from the Neurons for ITSM application, your role must have create and edit permission for actions. Refer to Working with Roles.
- Log in to Neurons for ITSM.
- Open a workspace.
- From the Action Menu, select Edit Actions. The application displays the Action Designer selection popup.
- Select Classic Action Designer.
Accessing the Classic Action Designer from the Configuration Console
- From the Configuration Console, click Build > Automation Tools > Quick Actions to open the Actions Manager workspace. The list of business objects that have actions appears.
- Click Add/Editto see the actions for the business object. The application displays the Action Designer selection popup.
- Select Classic Action Designer
- Open an action from either the Your Actions or the Create New Actions tab.
Parts of the Classic Action Designer
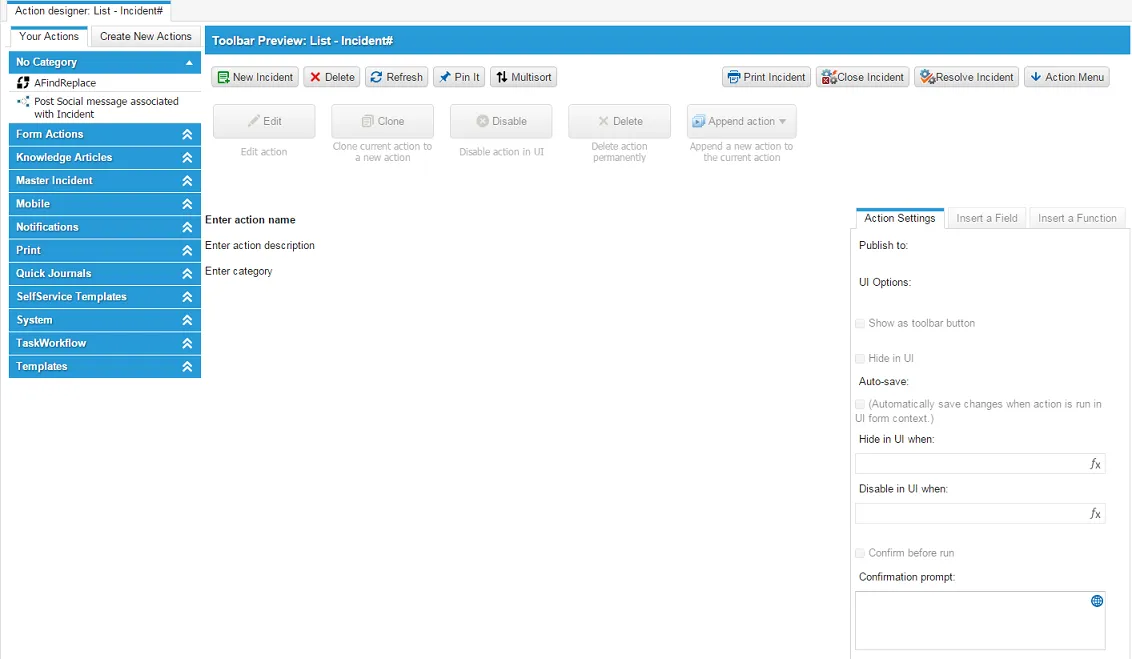
The Classic Action Designer consists of three main areas:
- The actions tabs on the left.
Your Actions | Actions defined for the specific workspace and your logged-in role. Some of the actions are grouped into folders. By default, the actions are filtered based on their association. |
|---|---|
Create New Actions | Action types that you use to create actions. |
- The toolbar preview list contains actions defined for the workspace.
These actions are defined for each individual workspace by the administrator.
If these actions are not accessible to you, a lock button appears in the upper right corner of each action button.
- The actions interface is the main area of the window.
Field | Description |
|---|---|
Button area | Contains the interface buttons, such as Edit, Clone, Disable, Delete, References and Append action. |
Configuration interface | Contains the action parameters. Each action type has different parameters. |
Action Settings tab | For the selected action, contains the publishing permissions, visibility, and prompt requirements. Refer to Action Settings Tab. |
Insert a Field tab | Contains the fields and relationships that are associated with a business object. Drag and drop a field or relationship into the configuration interface area. |
Insert a Function tab | Contains the functions that are associated with a business object. Drag and drop a function into the configuration interface area. |
Creating a New Action
- From the Configuration Console, click Build > Automation Tools > Quick Actions to open the Actions Manager workspace. The list of business objects that have actions appears.
- Click Add/Edit to see the actions for the business object. The application displays the Action Designer selection popup.
- Select Classic Action Designer.
- Select the Create New Actions tab to view a list of action guides. These guides are the basis for various actions.
- Select an action guide type. The Action Configuration interface appears.
- Enter data into the configuration fields as required. Each action guide uses both common and specific fields. Refer to Common Action Fields. For specific parameters and actions for the action type, refer to Action Templates.
- Click Save. The action now appears under the No Category section of the Action Menu.
Modifying an Action
You can change specific actions within an action. For example, you can change which fields are referenced within an action.
If your action(s) includes deprecated action(s), you will either be warned about limited editing functionality (CAD), or these actions won't be visible (GAD).
- From the Configuration Console, click Build > Automation Tools > Quick Actions to open the Actions Manager workspace. The list of business objects that have actions appears.
- Click Add/Edit to see the actions for the business object. The application displays the Action Designer selection popup.
- Select Classic Action Designer.
- Select the action from the Your Actions list. The Action Configuration interface appears.
- Click Edit from the button area to activate the configuration interface.

- Modify the configuration fields as required. Each action guide uses both common and specific fields. See Common Action Fields. For specific parameters and actions for the action type, refer to Action Templates.
- Click Save.
View Quick Action References
Use the References option to view where a Quick Action is used before you modify or delete it. This helps you identify dependent components and avoid breaking existing configurations.
The Quick Action References dialog displays the components that reference the selected Quick Action. Each reference type displays relevant attributes that help you identify where the Quick Action is used.
To view references for a Quick Action
- Open the Classic Action Designer.
- Select the Quick Action from the Your Actions list.
- Click References.
The Quick Action References dialog opens.
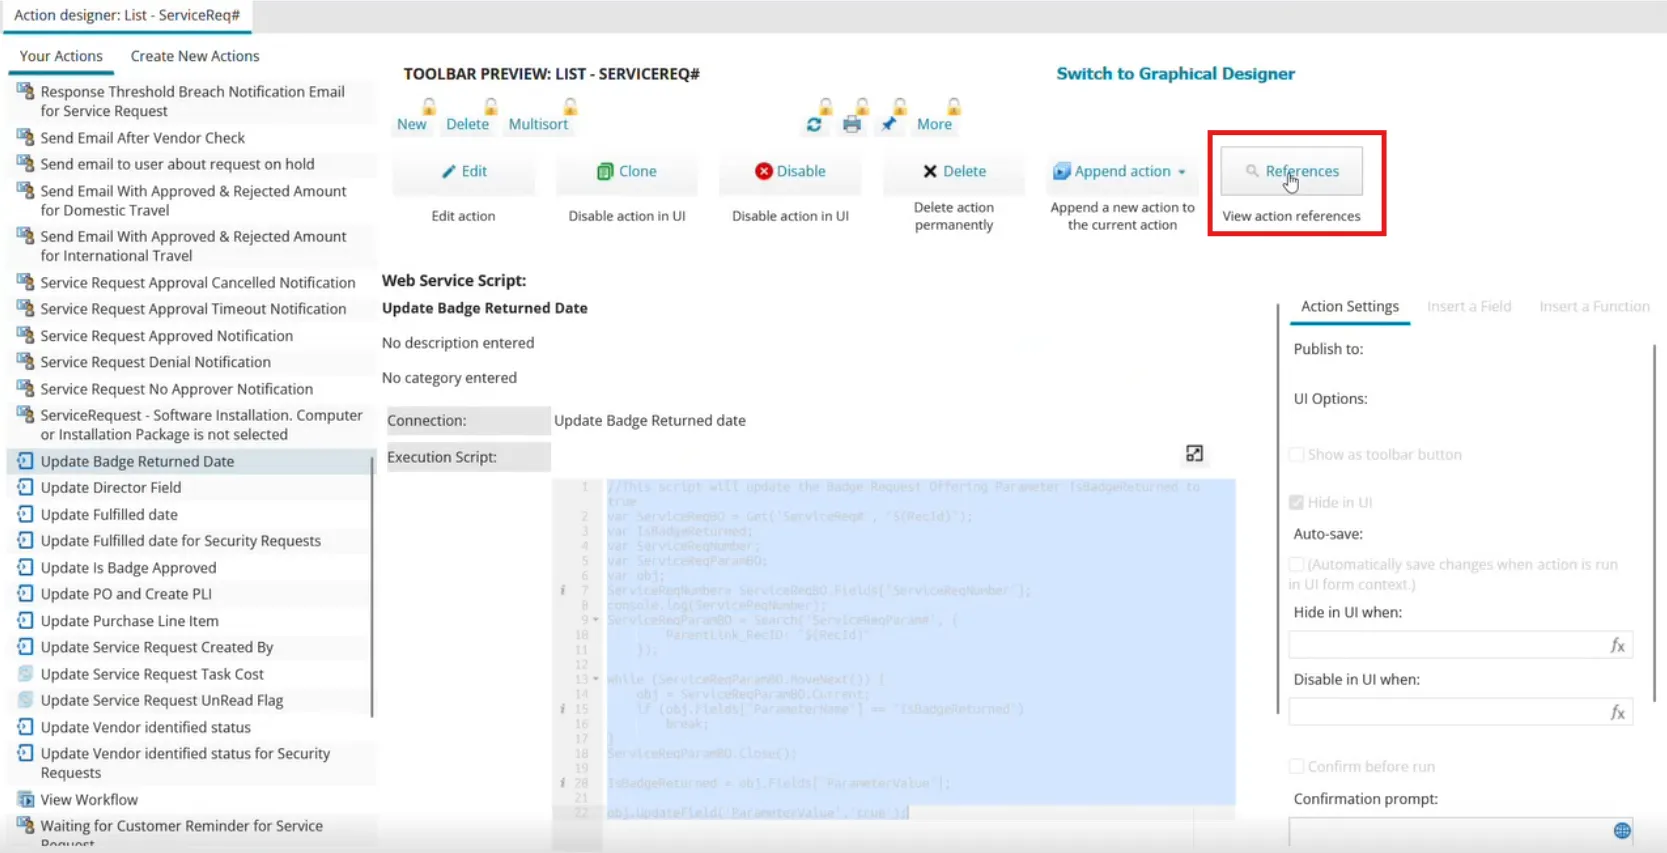
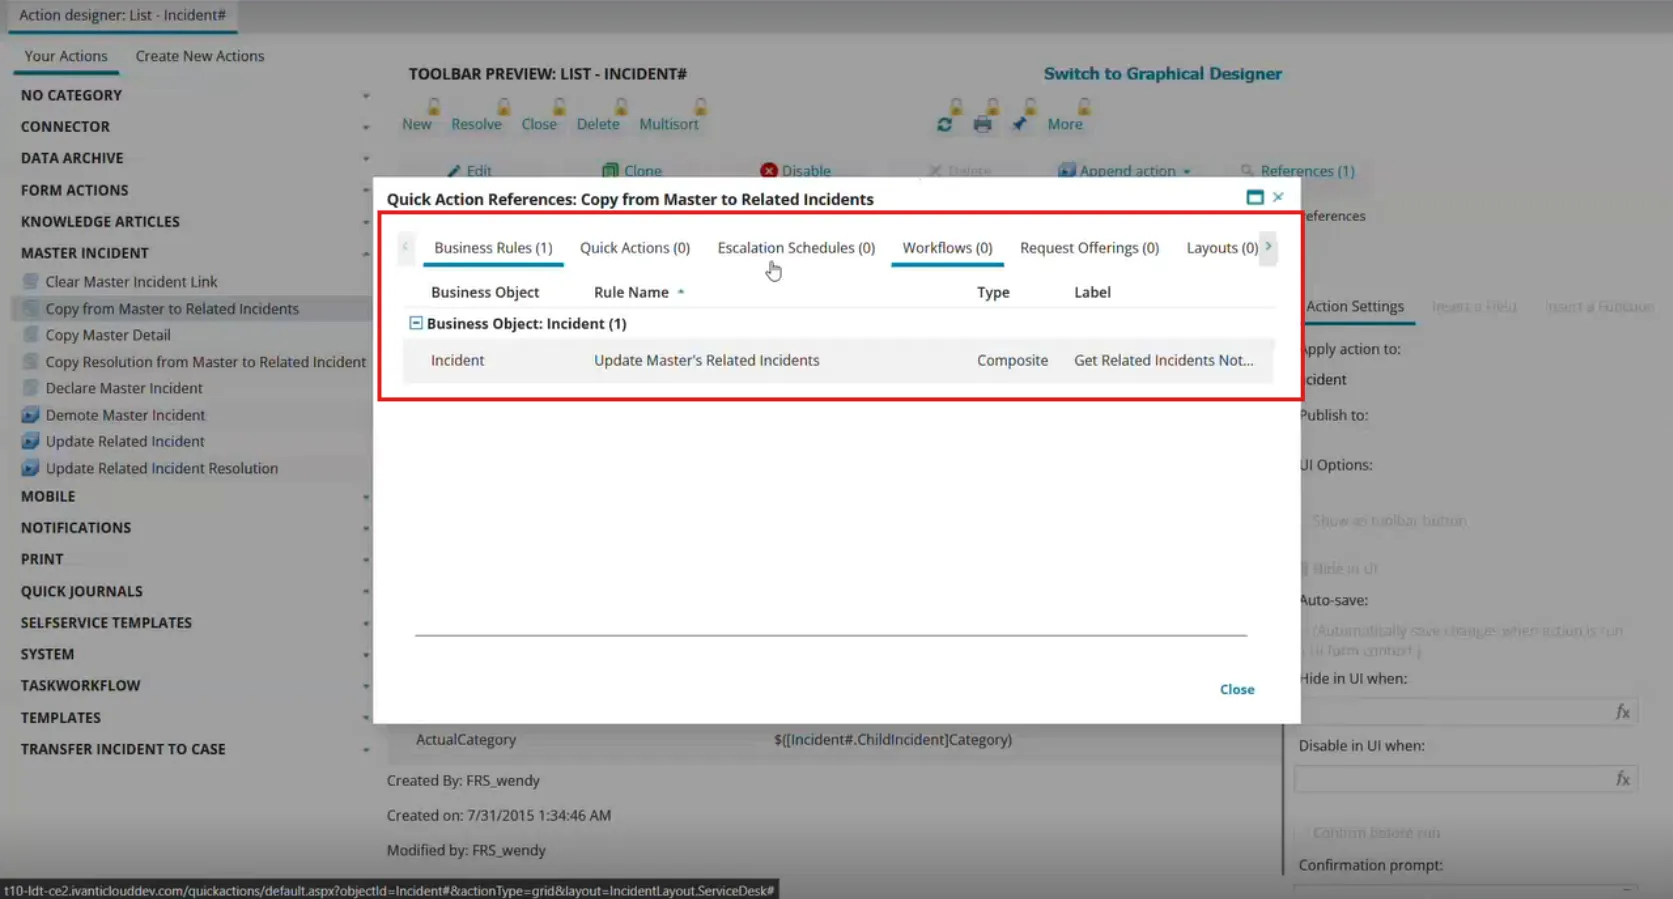
The dialog displays the components that reference the selected Quick Action.
Each reference type displays relevant attributes that help you identify where the Quick Action is used within that component.
Adding Multiple Actions to an Action
Refer to Adding Multiple Actions to a Quick Action.
Disabling an Action
You can disable an action without deleting it or removing it permanently from the Your Actions list. For example, if you have created an action that you might not want to make available immediately, you can disable it.
- From the Configuration Console, click Build > Automation Tools > Quick Actions to open the Actions Manager workspace. The list of business objects that have actions appears.
- Click Add/Edit to see the actions for the business object. The application displays the Action Designer selection popup.
- Select Classic Action Designer.
- Click the Your Actions tab and select the action to disable.
- From the action header, click Disable. The button now reads enable.
- To enable the action, click Enable. The button now reads disable.
Disabled actions continue to send notifications when defined to operate within a workflow. To prevent disabled actions from sending notifications, you must remove the action from each workflow block.
Deleting an Action
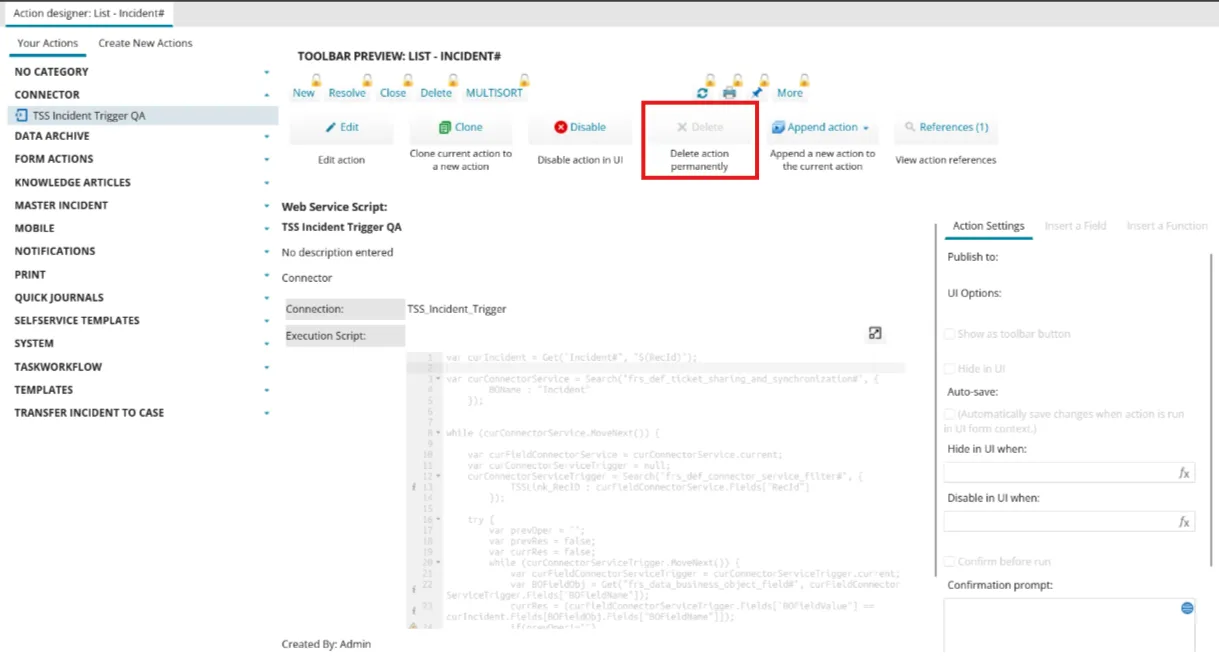
- The Delete option is disabled for quick actions that have a linked references. You can delete a quick action only when it does not have a reference.
- If a quick action has a reference, first delete the reference, and then delete the quick action. Alternatively, raise a service request to enable override of the restriction on deleting Quick Actions with references. After you enable this setting, the Delete anyway option becomes available, allowing you to delete Quick Actions even if they have existing references.
- In Ivanti Cloud environments, you can enable this option only in staging, UAT, or other development environments. You cannot enable this option in production.
From the Configuration Console
- Click Build > Automation Tools > Quick Actions to open the Actions Manager workspace. The list of business objects that have actions appears.
- Click Add/Edit to see the actions for the business object. The application displays the Action Designer selection popup.
- Select Classic Action Designer.
- Click the Your Actions tab and select the action to delete.
- If the quick action has a linked reference, the Delete option is unavailable.
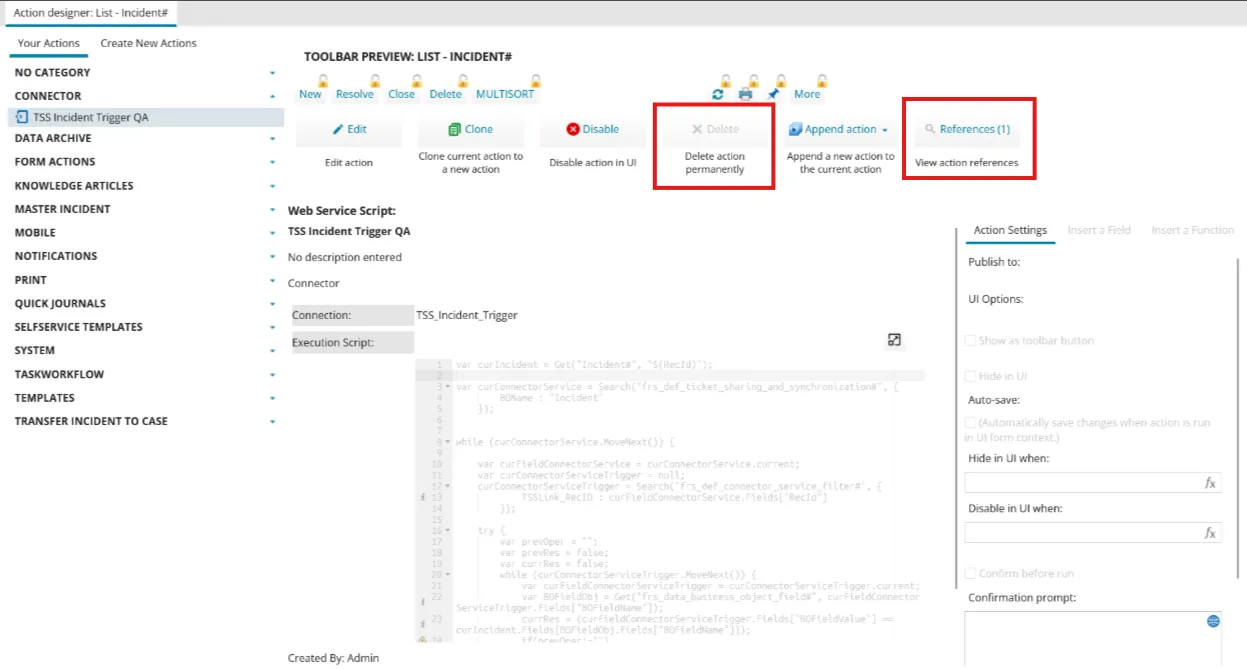
To override this restriction, raise a service request to enable the Delete anyway option.
- If the Delete anyway option is enabled, the Delete button becomes available. When you click Delete, the application displays the list of references. The Quick Action dialog opens and displays the following message: “This action is referenced by other components and should not be deleted.”
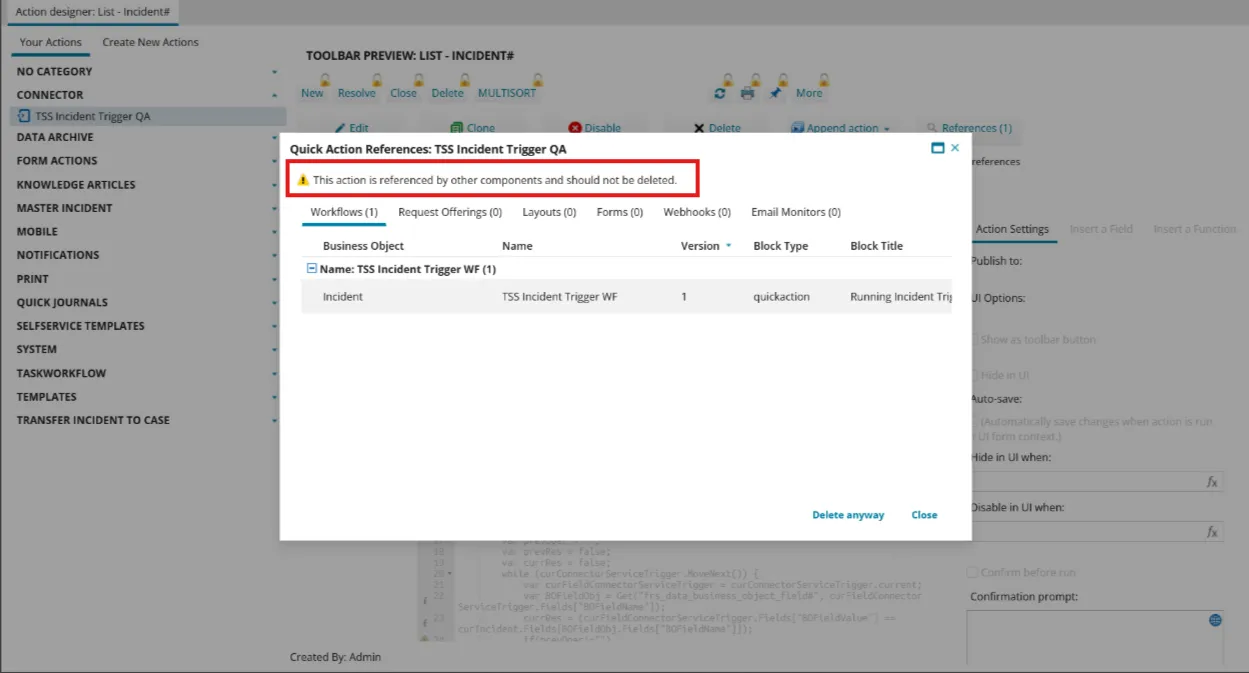
- If you still want to delete the Quick Action even though references exist, click Delete anyway. The Delete Confirmation dialog appears.
- Click Yes to delete the Quick Action.
Configure Delete Behavior for Referenced Quick Actions
You can control whether users can delete Quick Actions that are referenced by other components. This behavior is managed through a feature configuration in Feature Management.
To configure delete behavior for referenced Quick Actions
- Open Feature Management.
- In the list view, locate the feature: "PreventReferencedQuickActionDeletion"
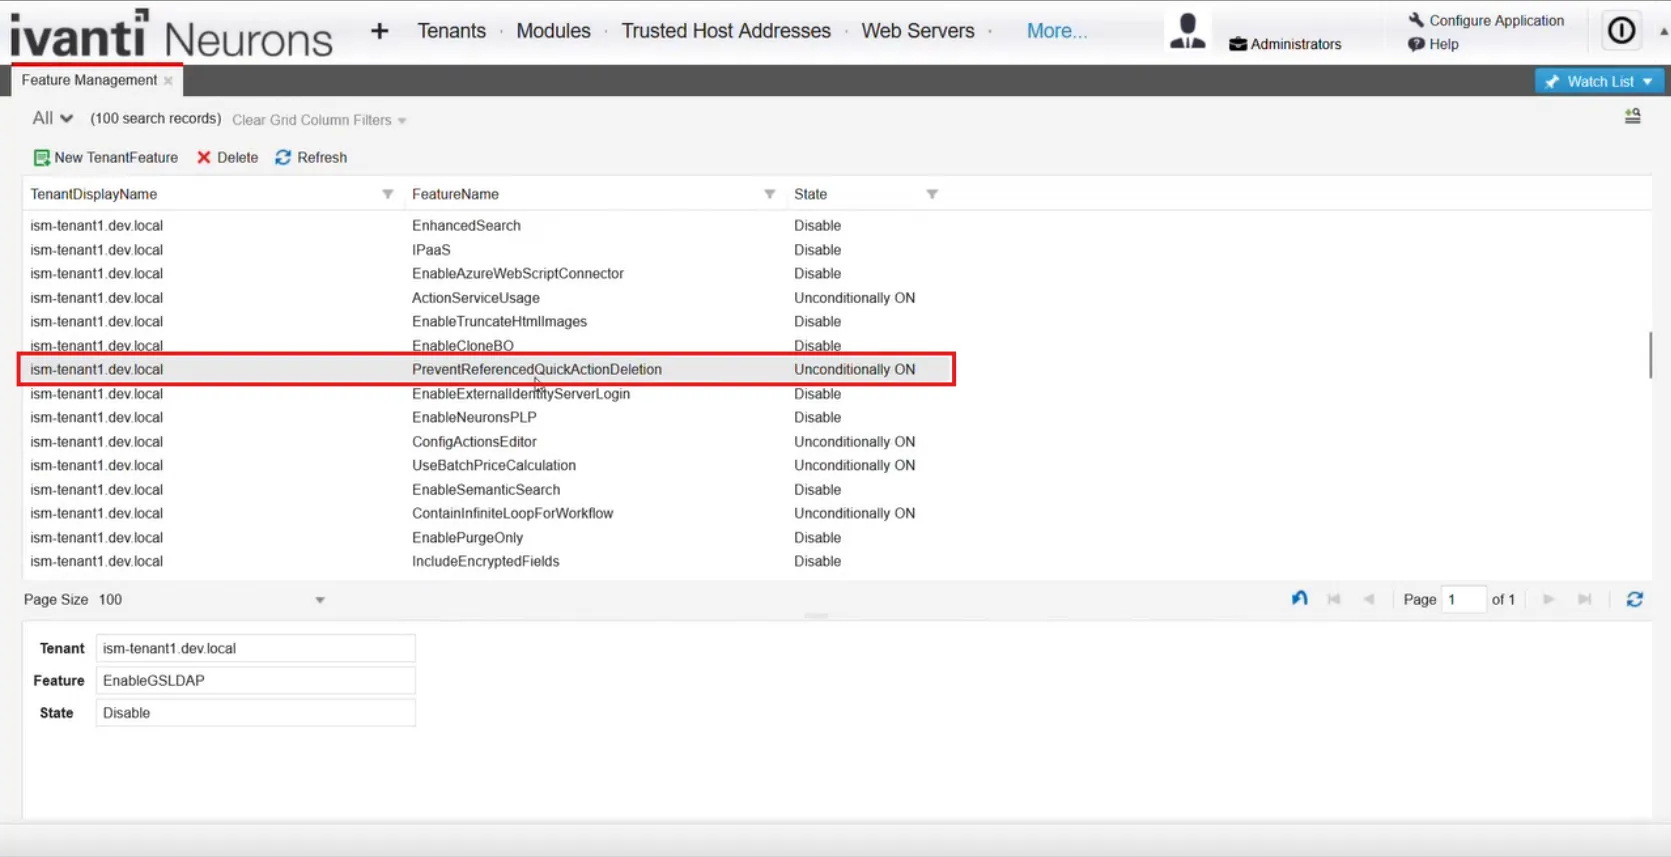
- Select the feature to open its details.
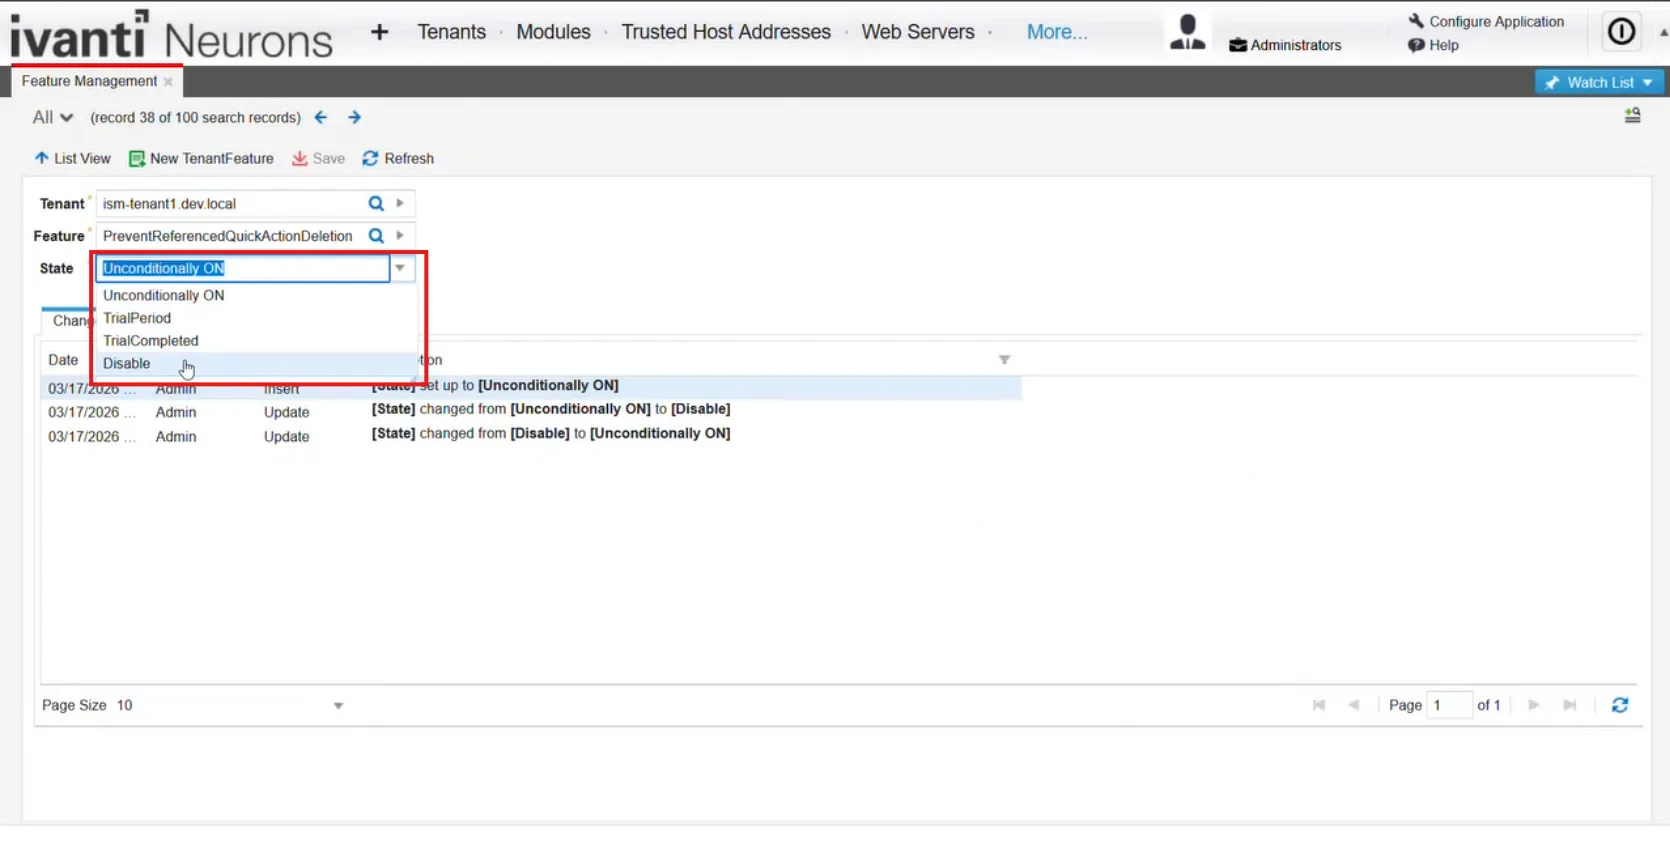
- In the State field, select the required option:
- Unconditionally ON
- TrialPeriod
- TrialCompleted
- Disable
- Click Save.
Behavior based on the feature state
When set to Unconditionally ON
- If a Quick Action is referenced by other components:
- The system blocks the delete operation.
When set to Disable
- If a Quick Action is referenced by other components:
- The system displays a warning in the Quick Action References dialog. “This action is referenced by other components and should not be deleted.”
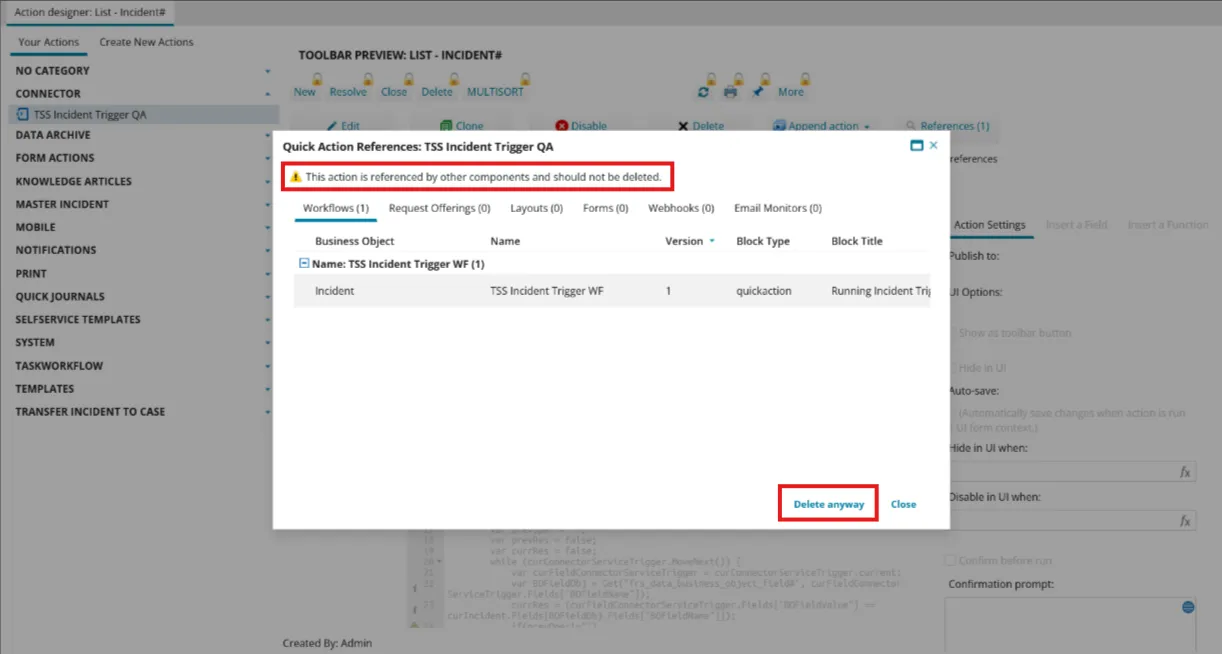
- The Delete anyway option is available.