
Assigning Resources in a Project Phase
With the addition of resource capacity, you can select and updates resources from the Project Phase itself.
Selecting a Resource
- Log in as a Portfolio Manager, Project Manager, or Demand Manager.
- Open the Project Phase workspace.
- Select a Phase from the list.
- Select the Resources tab.
- Click Link and select the required resources from the list.
- Click Select to add the resources.
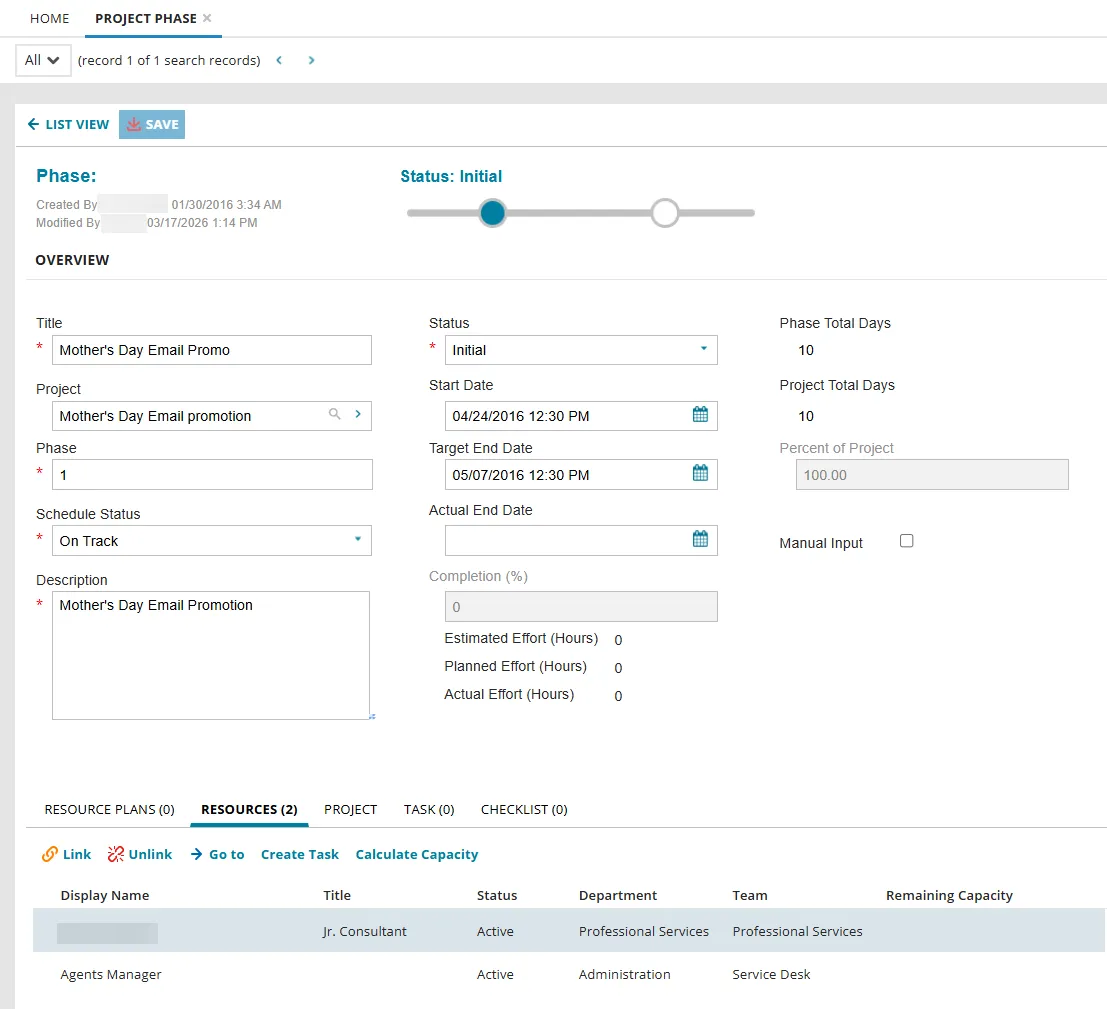
- Once the resources are added, click Save.
Calculate Capacity:
To calculate remaining capacity of a resource under the Resources tab, refer to Calculate Resource Capacity.
Create a task for the resource:
To create a task for a resource, do the following:
- Click the Resources tab in the Project Phase workspace.
- Select an employee from the given list who has the capacity to complete a task.
- Click Create Task and fill in the following fields:
a. Subject*: Enter a name for the task.
b. Details: Enter any details associated with the task.
c. Phase*: From the dropdown, select the project phase you want to create the task for.
The dropdown lists only the Phases that are in the Active or Initial state and have a Project associated with them.
d. Priority: From the dropdown, assign the task priority. The value ranges from 1 to 5 (in the order of highest to lowest).
e. Planned Effort (Hrs.): Enter the expected effort in hours for completing the task.
- Click OK.
The task is now created and it appears under the Task tab in the Project Phase workspace.
Mandatory fields are marked with an asterisk.
Some Project Phases do not have a Project linked when created by users with the Administrator role. As a result, these Project Phases do not appear as options when selecting a phase while creating a new task. Therefore, we recommend that users with the Demand Manager, Project Manager, or Portfolio Manager roles create new Project Phases from within the Project workspace.