
Business rules
2 min
Use business rules to reduce the manual effort of creating/updating records for repeatable actions. For example, you can automate tasks for modifying CI records or creating a new record based on action details when trigger conditions are met.
To create a business rule
- At the top-right corner of the page, click Admin, then scroll down to the Others heading and click the Business Rules icon. The Business Rule page displays.
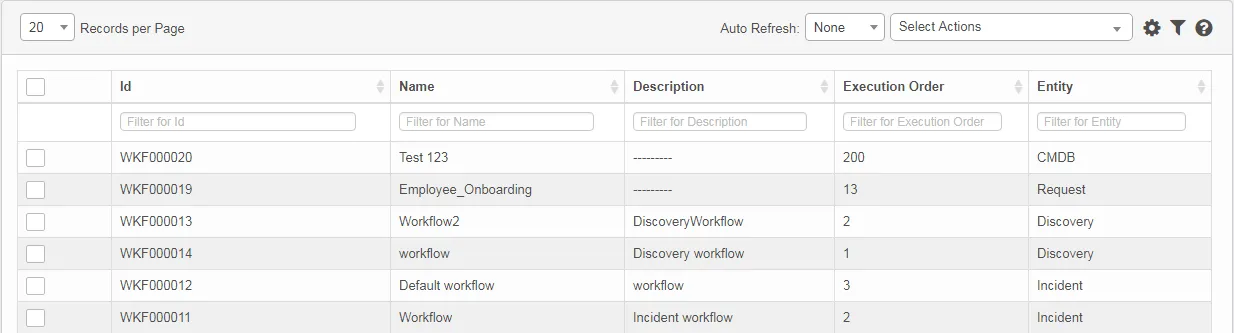
- From the Select Actions drop-down, select New Business Rule. The New Business Rule page displays.
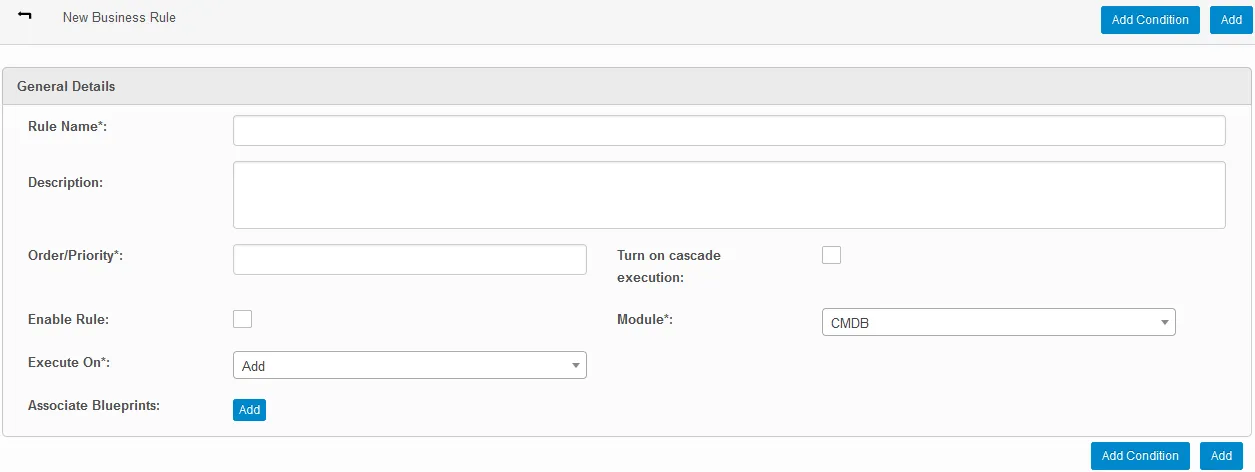
- Enter a name for the new rule, as well as a description.
- Enter an order/priority number to specify the order of the rules to be executed when there are multiple rules set for the selected module.
- Select the Turn on Cascade Execution option to execute the next enabled business rule based on the order/priority for the same module.
- Select the Enable Rule option to make the rule active.
- From the Module drop-down, select the module for this rule.
- Select a default for the Execute on option.
- To associate blueprints or templates with this rule, click Add and select the items.
- Click the Add Condition button.
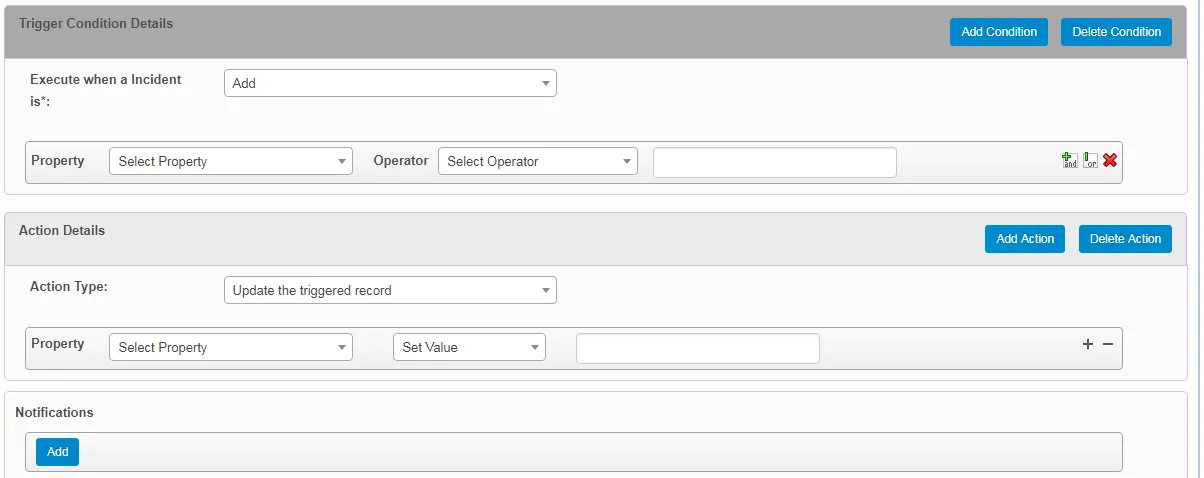
- Under Trigger Condition Details, select a property and an operator. Two or more conditions can be combined using the icons.

- Click Add Condition for each condition you create.
- Under Action Details, select the action type to be performed upon triggering the condition.
- Select a property and set a value from the drop-downs.
- Click Add Action for each action you define.
- For notifications, click Add to send a notification to a user upon triggering a business rule.
- When finished, click Add in the bottom-right corner of the page.
NOTES:
- Two business rules cannot have the same execution order.
- All mandatory fields of an ITSM record should be defined under the Action Details area.
- Two or more conditions can be combined using AND or OR logical conditions.