Firebase Configuration for Mobile Push Notification
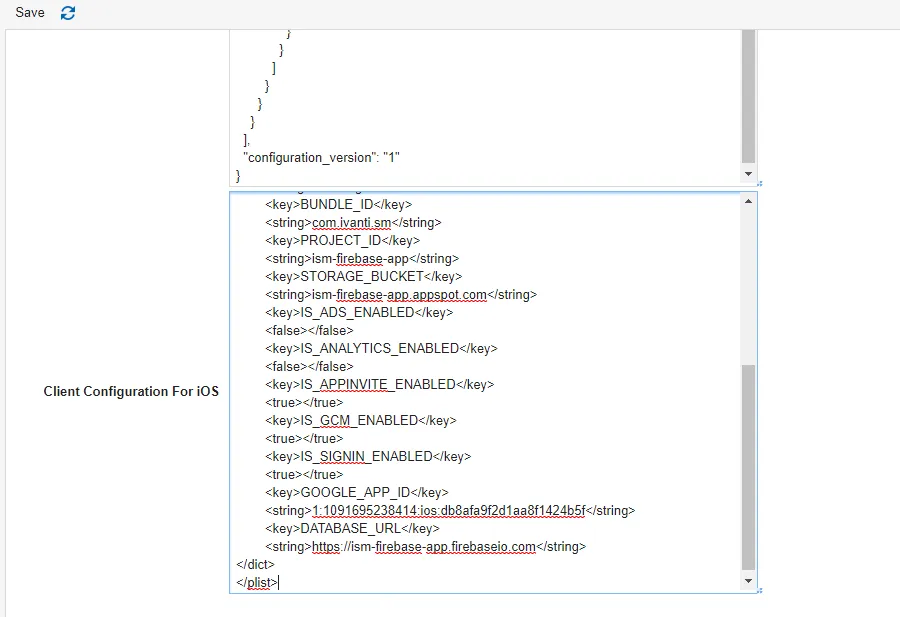
A new workspace - FCM Configuration is added to ConfigDB. The following are its sections:
- Project Id: Project Id of the firebase which we going to configure in future step. This Id is used by the server to send the push notification.
- Server Key: Unique key that is present inside the firebase project. This key is used by the Server to send the push notification.
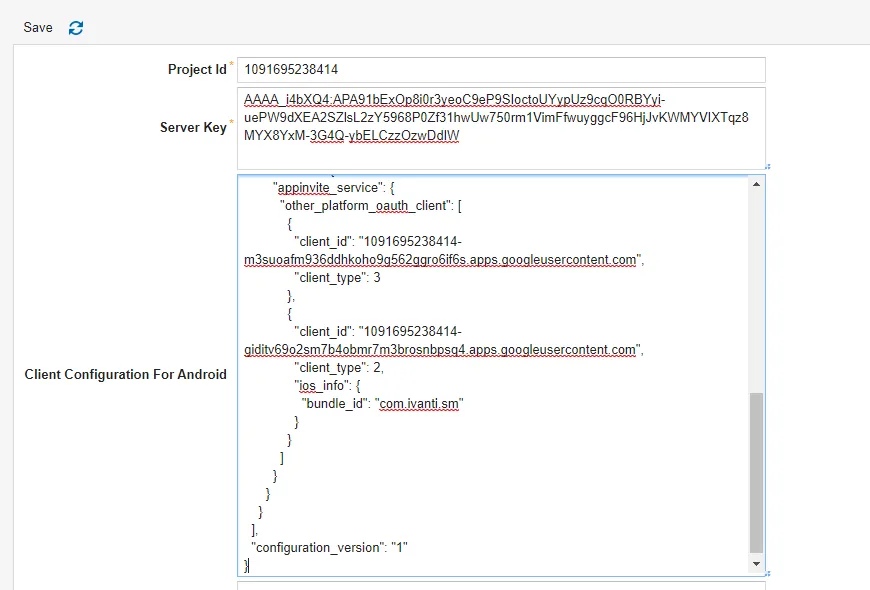
- Client configuration for Android: json configuration which is used by android mobile to generate FCM token. This configuration will be present in Firebase project we need to add in config Database
- Client configuration for iOS: Configuration which used by iOS device to generate FCM token.
The following steps should be performed for Mobile Push Notification to work:
Creating a new Project in Firebase
- Navigate to https://firebase.google.com/ to create a new project. Since Firebase is from google, you need to sign into your Gmail account so the Firebase project is associated with your Gmail account.
- Navigate to firebase.com and click Go to console on the top right corner of the page.
- Click the Create a project tile (for new Users) or Add Project (for existing users) in the firebase.
- Enter the project name, select the I accept the firebase terms check box and click Continue.
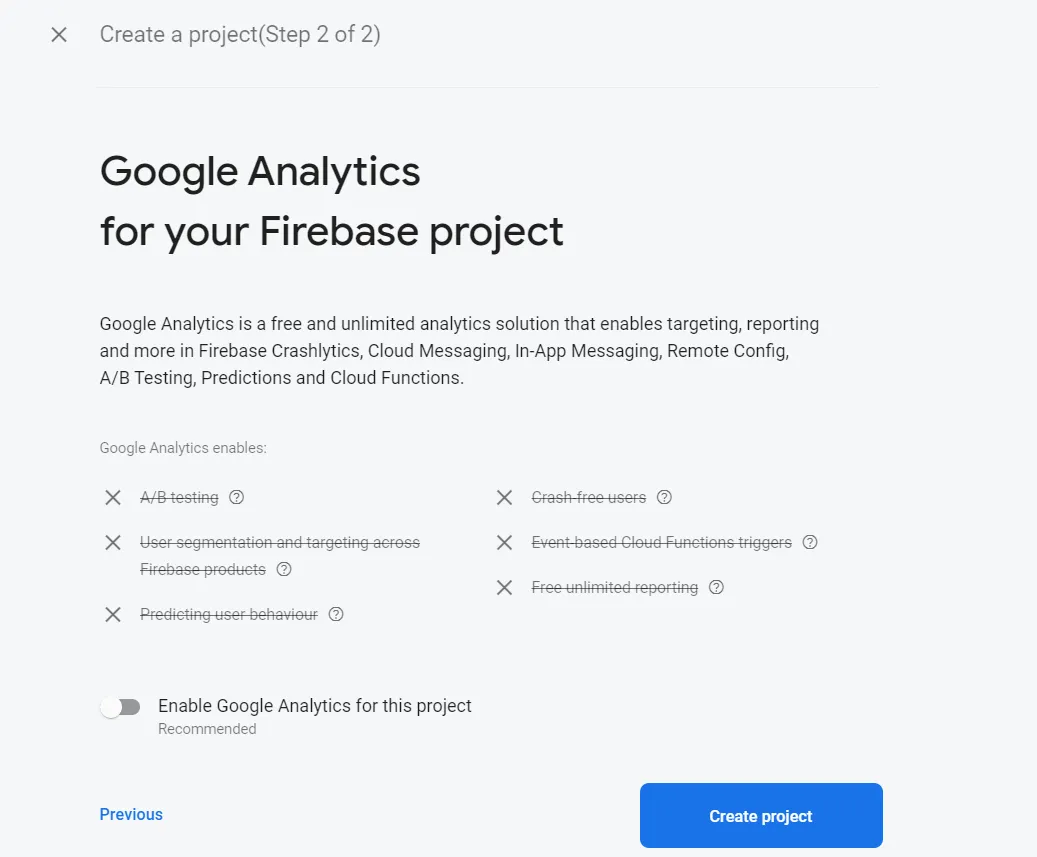
- Disable Google Analytics and click Create Project.
Configure iOS and Android app in Firebase.
In this step, you will create iOS and Android app in the firebase project.
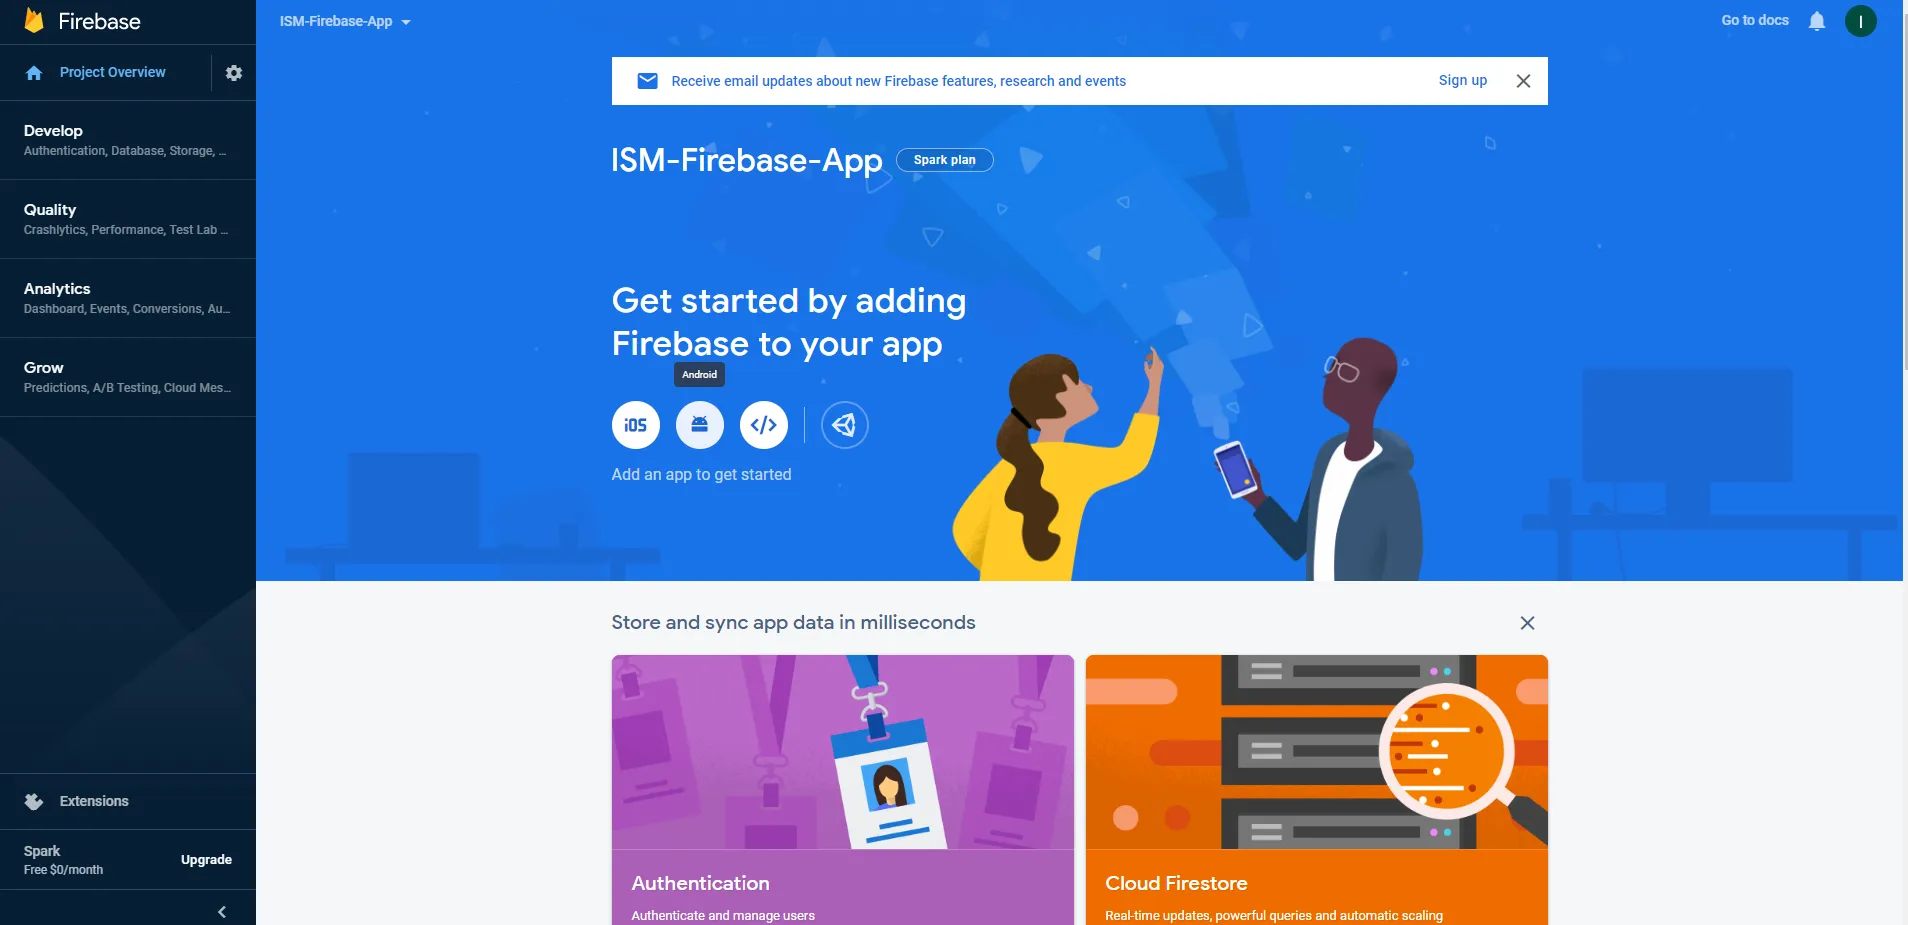
1.Navigate to the newly created project.
- Click on the Android icon to create new Android app.
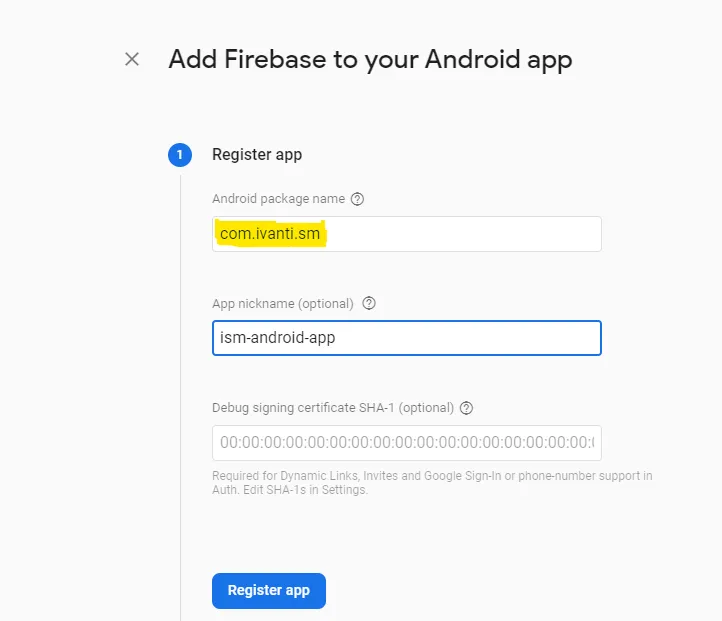
- Enter the name of the package - it should always be com.ivanti.sm” in the Android Package name and enter any name in App Nickname. Ensure the package name is right and click on Register app.
Click on download google.service.json which is json configuration for Android. Download this file and click Next.
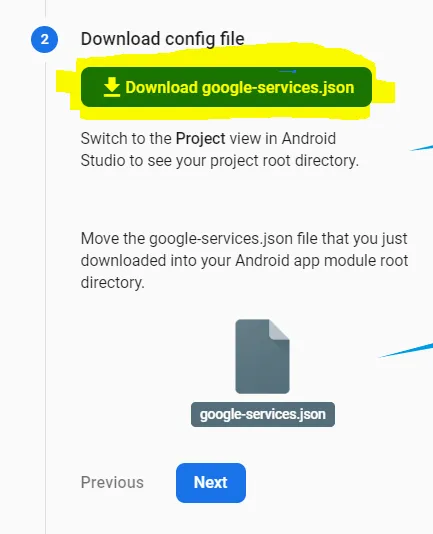
- Skip Step 3 by clicking on Next – (Add Firebase SDK)
- Click Continue to the console.
If you see “Run your app to verify installation” step then you can click on “Skip this step” and then click Continue to console.
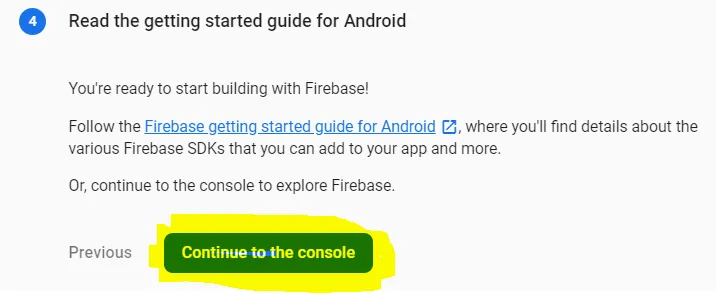
- Once all these steps are completed, you have the Android app ready in the firebase project.
- Now, do the same for iOS.
- Click on Add app again in the firebase project and select iOS.
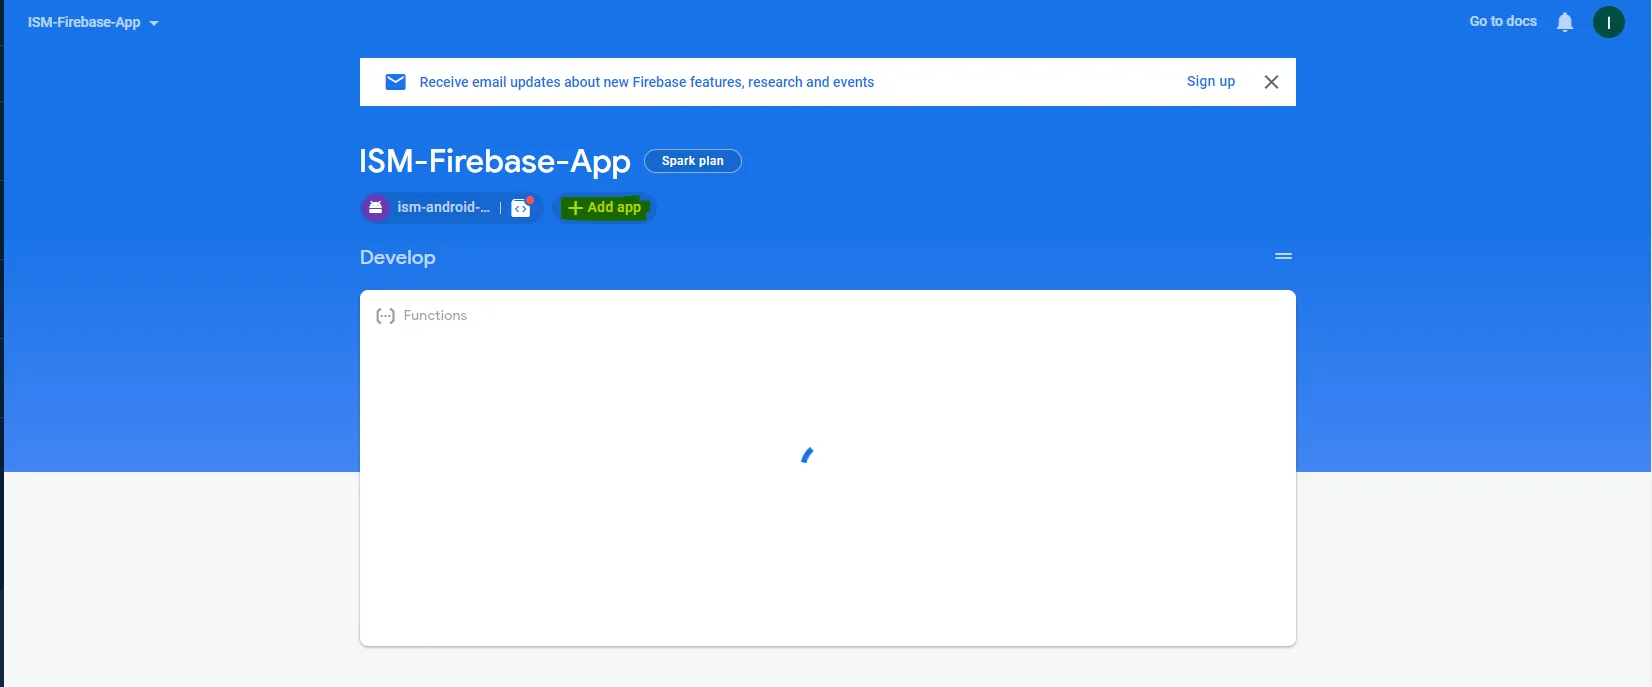
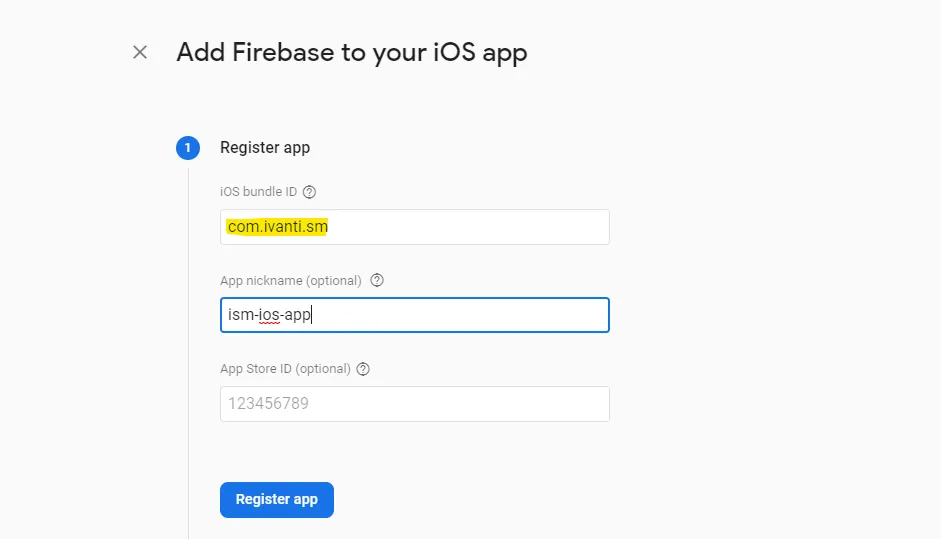
- Specify the same package name com.ivanti.sm in the iOS bundle ID, enter the App nickname and click on Register app.
- Click on Download GoogleServiceInfo.plist which contains the configuration for iOS device. and click Next.
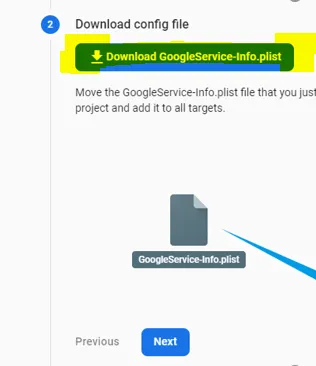
- Skip Step 3 by clicking on Next – (Add Firebase SDK).
- Skip Step 4 by clicking on Next – (Add Initialisation code).
- Click Continue to Console in step 5.
If you see Run your app to verify installation step, click Skip this step and then click Continue to console.
Once these steps are completed, you have iOS and Android app configuration is ready in the firebase.
Apply iOS Certificate for iOS app
Ivanti will provide the APNs Certificate for iOS app. You can find the certificate at Ivanti Market Place.
1.Click the Setting button from top left and click on Project settings.
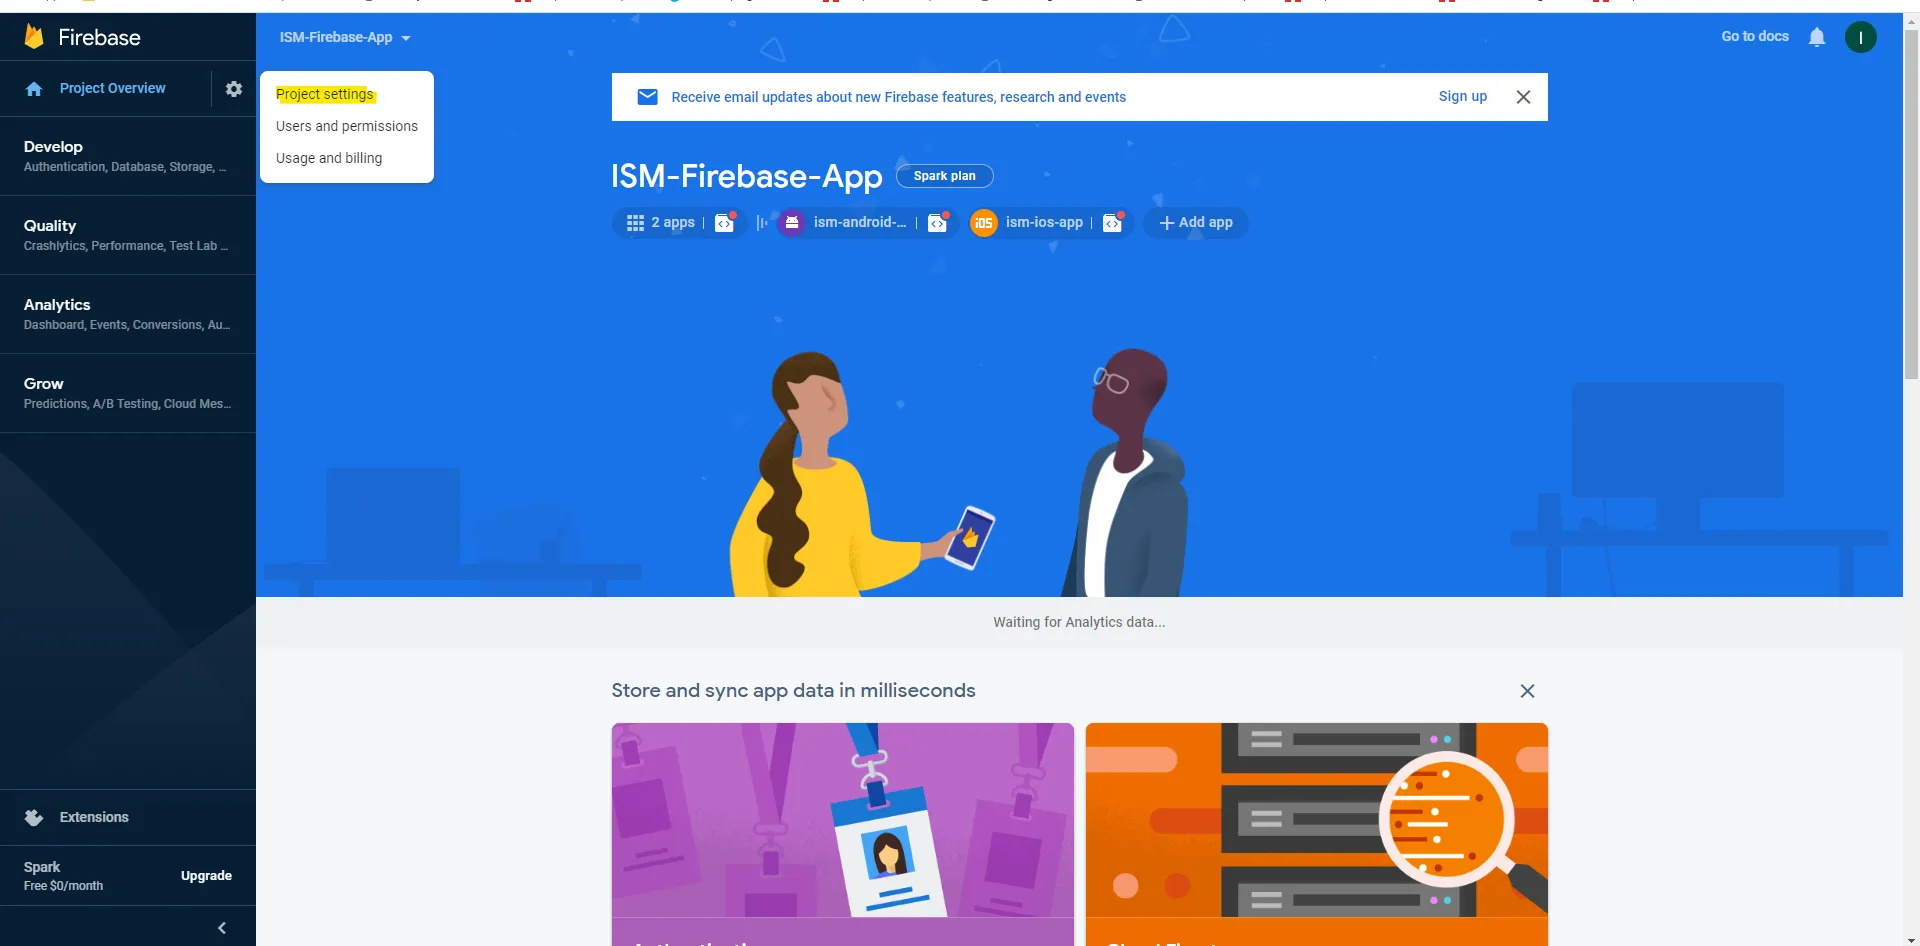
- Click the Cloud Messaging tab.
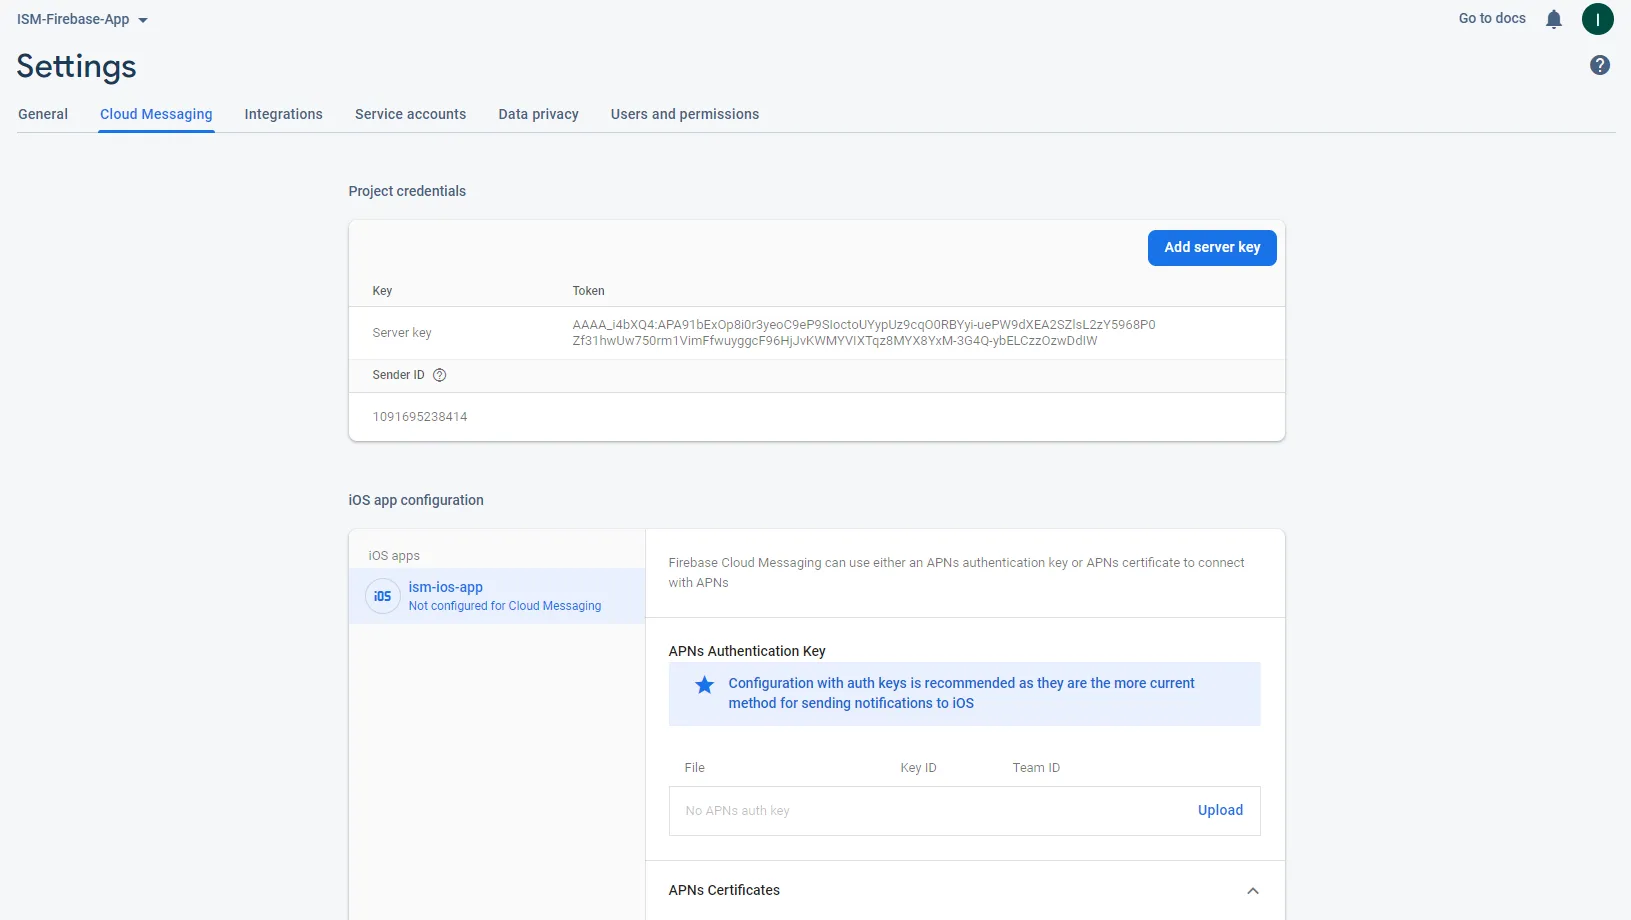
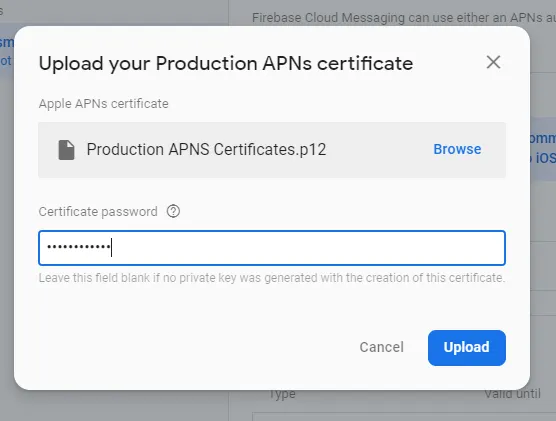
- Scroll down to the APNS Certificate section and click the Upload button.
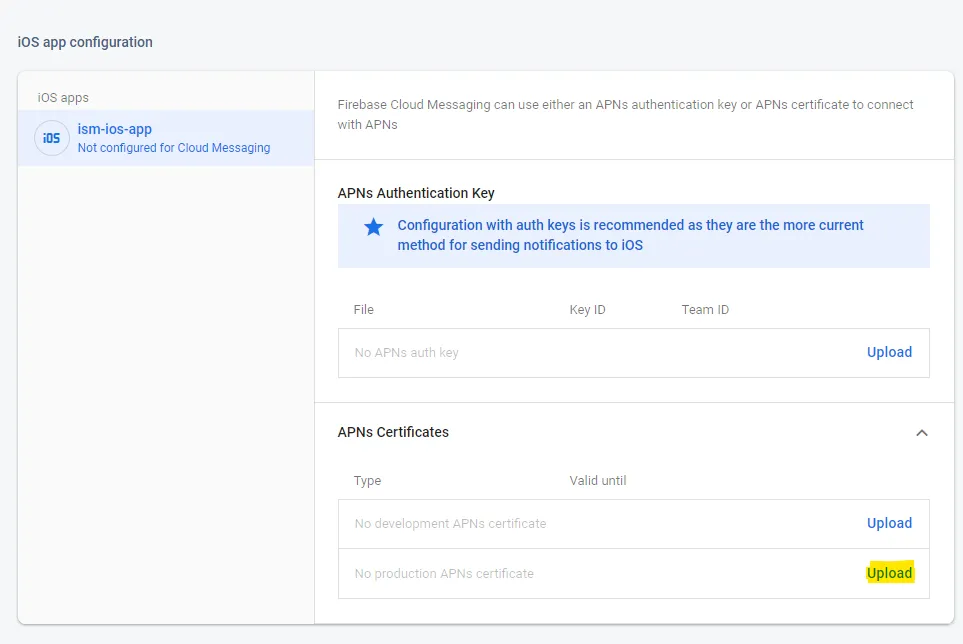
- Upload the APNs Certificate with password.
Configure Firebase in Config Database of ISM
1.Navigate to Project settings from the main page of Firebase Project.
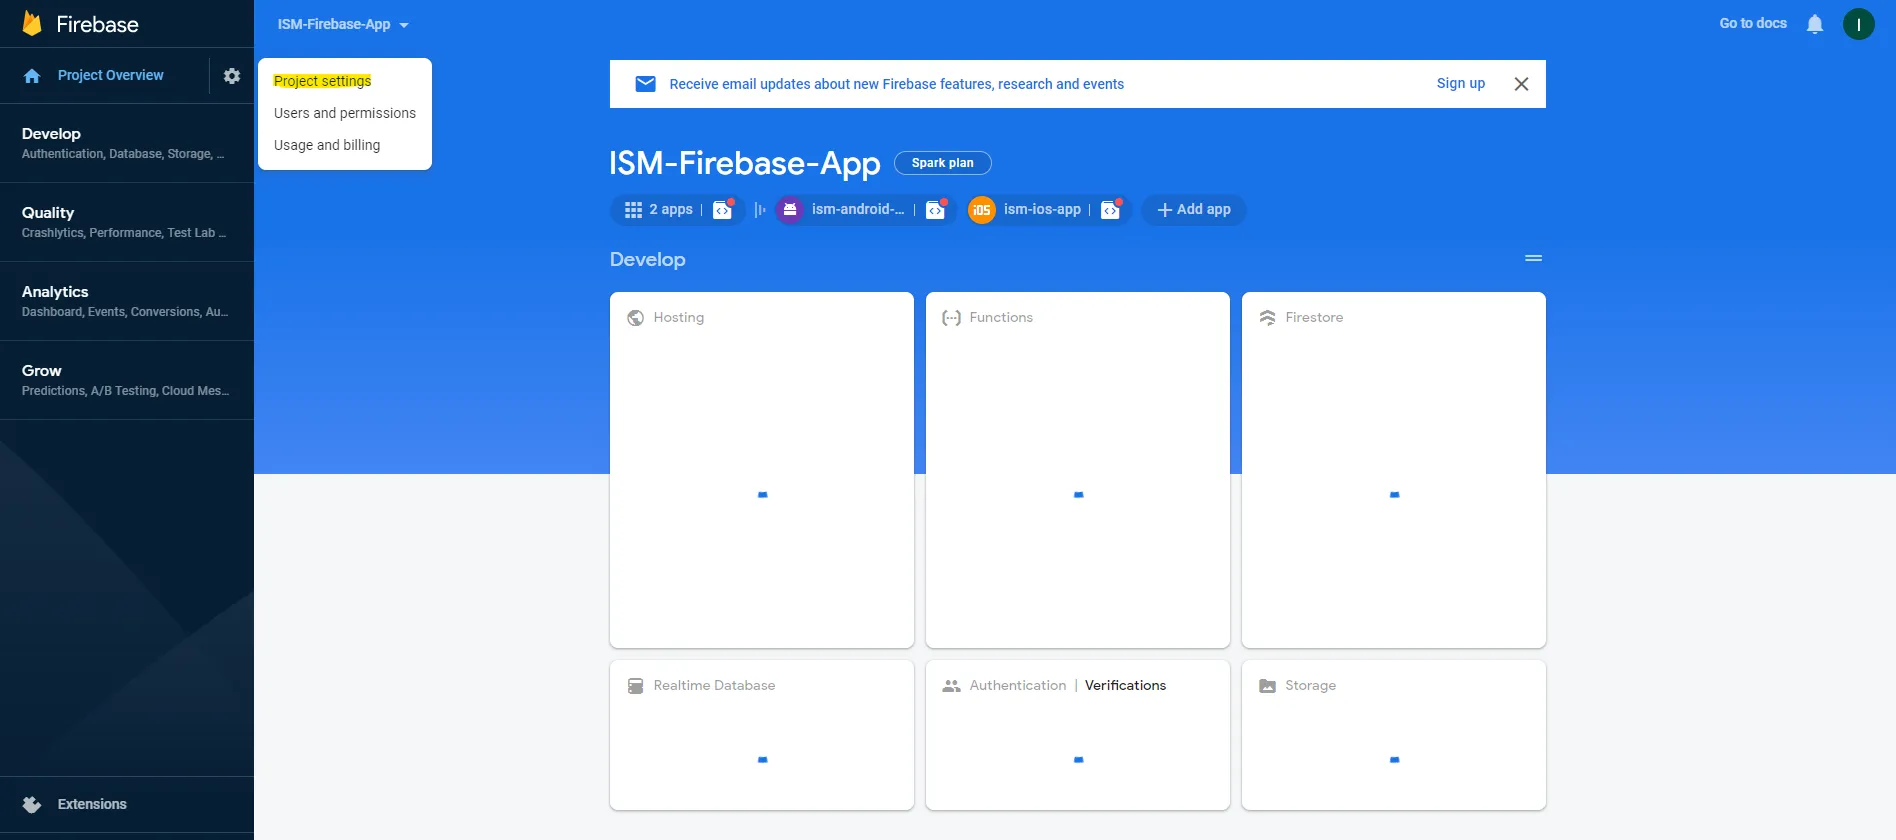
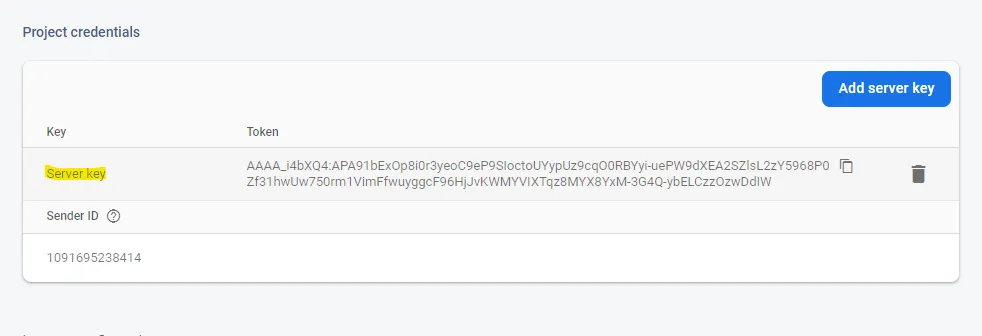
- Navigate Cloud Messaging Copy the Sender ID.
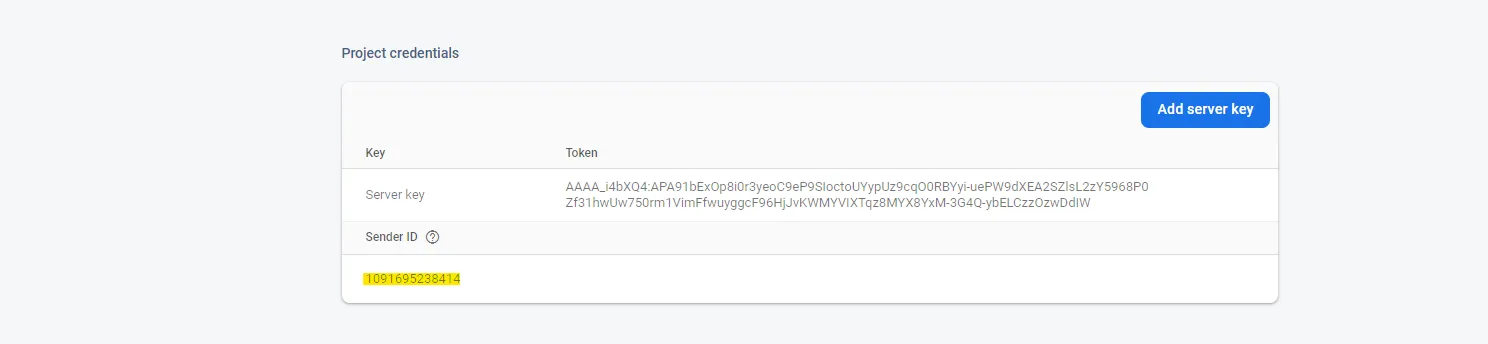
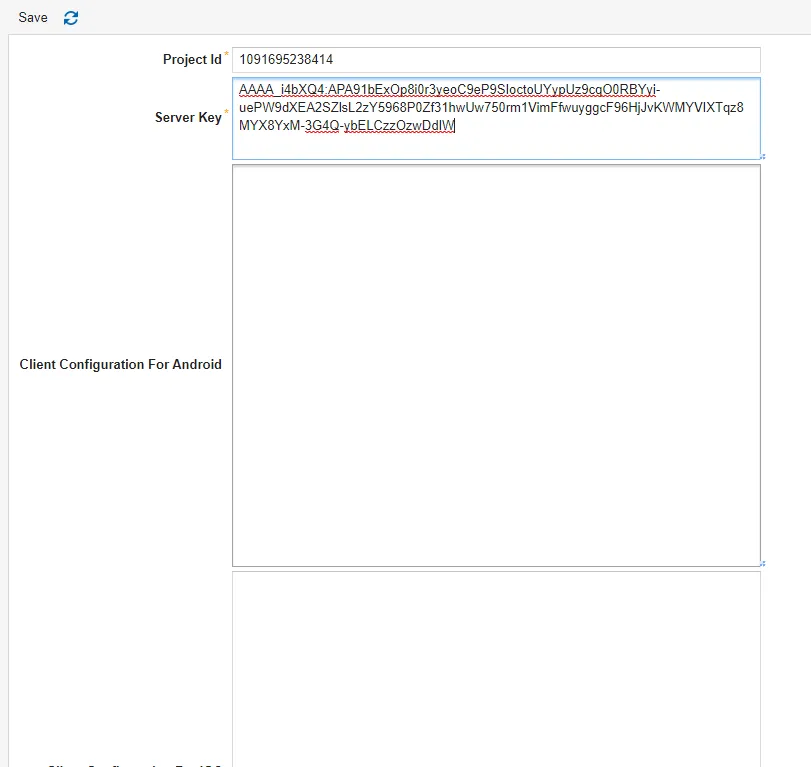
- Go to ISM CentralConfig, open FCM Configuration workspace and paste Sender ID which is copied to the Project ID in workspace.
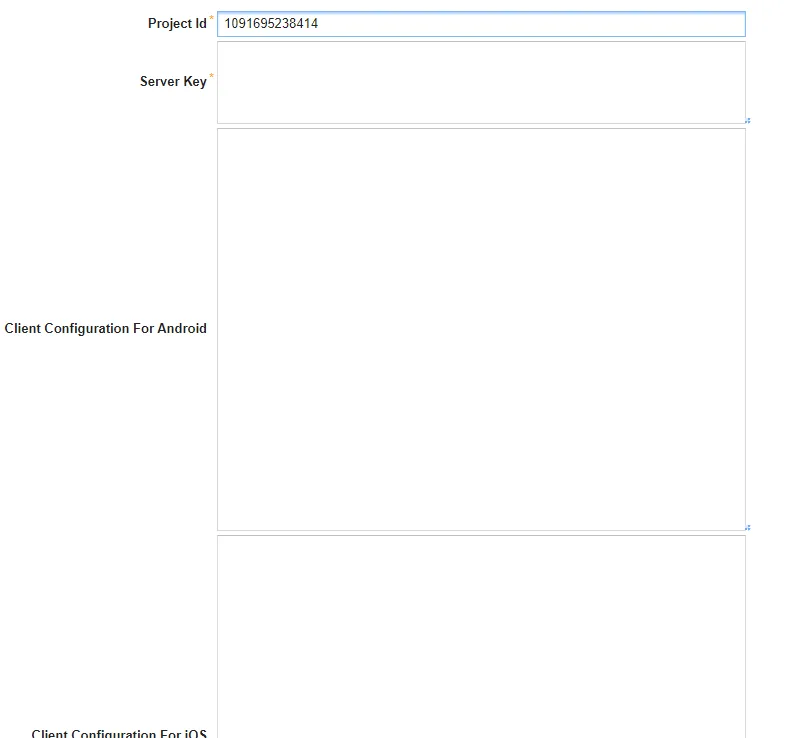
- Copy the Server Key from Cloud Messaging tab.
- Paste the Server Key in FCM Configuration workspace.
- Copy the entire content from google-service.json which is downloaded from Step – 3 and paste in the Client Configuration for Android.
- Finally, you need to add the iOS FCM configuration in config DB. Copy the entire content from GoogleService-Info.plist which is downloaded in step-3 and paste it in the Client Configuration for iOS and Save.